
 ChatGPT
 Perplexity
 Grok
Grok
 Google AI
Many WordPress websites miss valuable enquiries every day. Visitors often leave without contacting the business. This simple mistake can reduce enquiries and slow business growth. Poor forms also create a frustrating experience for potential customers. Some visitors abandon confusing forms before submitting their details.
Others leave because the process feels too complicated. Fortunately, the solution is straightforward. Learning how to add an online form to WordPress helps capture more enquiries. It also improves the experience for every visitor. This guide explains each step clearly. Even beginners can create a professional online form confidently.
Why Every WordPress Website Needs an Online Form
An online form makes communication simple and organised. Visitors can contact your business anytime. They do not need phone calls or lengthy emails. Every submission reaches the right person quickly.
A well-designed form also improves trust and encourages more enquiries. Many businesses choose to add a contact form to WordPress because it saves time and increases conversions.
Improve Communication
An online form removes unnecessary communication barriers. Visitors can send enquiries within minutes. They enjoy a smooth and professional experience.
Businesses also respond faster with complete information. Better communication builds trust from the first interaction.
Collect Quality Leads
A WordPress lead capture form gathers valuable customer information. You choose the details visitors should provide. This filters genuine enquiries from casual visitors. Better information supports stronger follow-up conversations. It also helps increase future sales opportunities.
Save Time with Automation
Modern forms automate repetitive administrative tasks. Email notifications arrive after every submission. Teams receive enquiries without constant monitoring. Form entries remain organised for future reference. This saves time and improves customer response speed.
Choose the Right WordPress Form Plugin
Choosing the right plugin makes form creation much easier. The best option depends on your website’s needs. Most plugins require little technical knowledge.
They also simplify future updates and maintenance.
What to Look For
Look for an easy drag-and-drop builder. It should work perfectly on mobile devices. Built-in spam protection keeps unwanted submissions away. Email notifications ensure every enquiry reaches your inbox. Useful integrations connect forms with marketing and business tools. A reliable WordPress form plugin should offer these essential features.
Popular Options
WPForms remains a popular choice for beginners. Every WPForms tutorial shows its simple setup process. Contact Form 7 offers flexibility for experienced users. Many businesses still prefer Contact Form 7 setup for custom forms. Other plugins include Fluent Forms, Gravity Forms, and Ninja Forms. Compare features before making your final decision.
How to Add an Online Form to WordPress (Step-by-Step)
Learning how to add an online form to WordPress takes only minutes. Most plugins follow a similar setup process. This WordPress form setup guide explains each step clearly. Beginners can create an online form in WordPress without technical experience.
Step 1. Install Your Plugin
Open your WordPress dashboard first. Navigate to the Plugins section. Click “Add New” to browse plugins. Search for your preferred form plugin. Install and activate the plugin immediately.
Step 2. Create Your First Form
Open the plugin after activation. Select the option to create a form. Choose a ready-made template or blank form. Add a suitable name before continuing.
Step 3. Customise Form Fields
Add only the fields you need. Include names, emails, and message boxes. Remove unnecessary fields to reduce friction. A shorter form usually increases submissions.
Step 4. Configure Email Notifications
Enable WordPress form notifications before publishing. Add the correct recipient email address. Create a helpful confirmation message. Test every notification before going live.
Step 5. Save the Form
Review every setting carefully. Save your completed form. It is now ready for your website. The next step is adding the form to a page.
How to Embed the Form on Your Website
Your form becomes useful after publishing it. Most plugins offer several embedding methods. Choose the option matching your website layout. Each method takes only a few minutes.
Use the Gutenberg Form Block
Most modern plugins support the Gutenberg form block. Open the page editor first. Add a new block to the page. Select your preferred form from the list. Publish the page after checking everything.
Use a Form Shortcode
Many plugins generate a unique form shortcode. Copy the shortcode from your plugin. Paste it into any supported area. Save your changes before previewing the page. This method offers greater placement flexibility.
Add Forms to Pages and Posts
Place forms where visitors expect them. Contact pages remain the most common choice. Landing pages also benefit from simple forms. You can easily embed a form in a WordPress page using supported plugins.
Add Forms to Widget Areas
Some themes support widget-ready areas. Add your form to the sidebar or footer. This improves visibility across multiple pages. Always check the layout after publishing.
Improve Form Security
Website forms often attract unwanted spam submissions. Strong security protects your business and visitors. Simple security settings reduce unnecessary risks. Most plugins include helpful protection features.
Enable reCAPTCHA
Enable reCAPTCHA spam protection before publishing your form. It blocks automated bots effectively. Genuine visitors complete forms without difficulty. Most plugins provide simple setup instructions.
Prevent Spam Submissions
Limit unnecessary form fields whenever possible. Enable spam filtering within your plugin. Block suspicious submissions automatically. Regular monitoring also improves overall security.
Protect Customer Information
Collect only essential customer details. Store submissions securely within your website. Update your plugin regularly for better protection. Strong security builds visitor confidence.
Customise Your Form for Better Conversions
Small improvements can increase completed submissions. Better forms create a smoother user experience. Every element should encourage visitors to continue. Follow this WordPress contact form tutorial for better results.
Keep Forms Short
Ask only necessary questions. Shorter forms feel easier to complete. Visitors often finish simple forms faster. Remove anything that adds unnecessary friction.
Use Clear Field Labels
Write labels using simple language. Avoid technical words whenever possible. Clear instructions reduce user mistakes. Visitors complete forms with greater confidence.
Add Smart Confirmations
Display a confirmation after every submission. Thank visitors for contacting your business. Explain what happens next. This creates a better customer experience.
Optimise Button Text
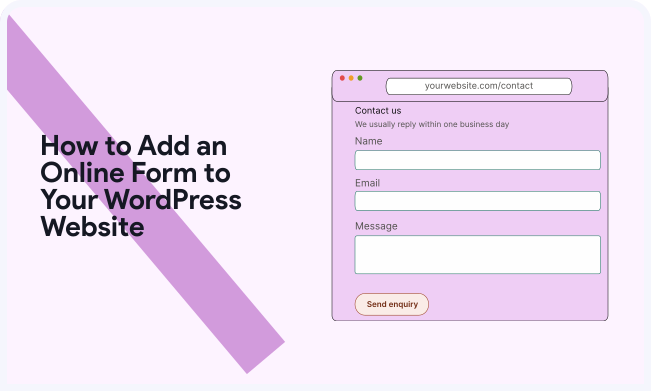
Replace generic button labels with action-focused wording. Use phrases like “Send Enquiry” instead. Clear buttons encourage more clicks. Every word should support the next action.
Make Forms Mobile-Friendly
Many visitors use mobile devices daily. Ensure every field displays correctly. Buttons should remain easy to tap. Test your form across different screen sizes.
Advanced Features Worth Using
Modern form plugins offer powerful features beyond basic contact forms. These tools improve user experience and streamline data collection. Enable only the features matching your business goals.
Multi-Step Forms
Long forms can overwhelm visitors. Multi-step WordPress forms split questions into smaller sections. This makes forms easier to complete. They also improve completion rates for detailed enquiries.
Conditional Logic
Conditional logic shows relevant fields only. Visitors answer fewer unnecessary questions. This creates a faster and cleaner experience. Smart forms also collect more accurate information.
File Uploads
Some forms require supporting documents. File uploads simplify this process. Visitors can attach images, PDFs, or other files. This reduces unnecessary email exchanges.
Save Entries
Most plugins store submissions automatically. A form submission database keeps every enquiry organised. You can review entries anytime. This prevents important enquiries from getting lost.
Common WordPress Form Problems and Fixes
Most form problems have simple solutions. Regular testing helps identify issues early. Small fixes keep your forms working smoothly.
Emails Not Arriving
Incorrect email settings cause many delivery problems. Check notification settings carefully. Verify your email address before testing. Many plugins also support SMTP services. These steps help fix WordPress form email issues.
Spam Messages
Spam affects many websites daily. Enable spam protection immediately. Keep your plugin updated regularly. Monitor submissions for unusual activity.
Broken Shortcode
Incorrect shortcodes prevent forms from displaying. Copy the shortcode directly from your plugin. Avoid editing the code manually. Preview the page before publishing.
Plugin Conflicts
Some plugins create compatibility problems. Disable recently installed plugins temporarily. Test your form after each change. Update every plugin to the latest version.
Styling Issues
Themes sometimes affect form appearance. Check your form across different devices. Adjust spacing and colours if needed. A clean layout improves usability.
Best Practices for High-Converting Forms
High-converting forms focus on simplicity and usability. Small improvements often deliver better results. Follow these practices for stronger performance.
- Ask only essential questions.
- Place forms above the fold.
- Write a strong call to action.
- Test every form regularly.
- Keep the design clean.
- Reduce unnecessary distractions.
- Optimise every form for mobile users.
Conclusion
Creating an online form becomes simple with the right approach. Choose a reliable plugin and follow each setup step carefully. Publish your form where visitors can easily find it.
Regular testing keeps everything working correctly. Keep your forms simple, secure, and mobile-friendly. Review submissions regularly and improve your forms over time. Small changes can increase completed enquiries significantly. Learning how to add an online form to WordPress helps capture more enquiries.
It also supports stronger customer relationships and business growth. A well-designed form creates a better experience for every visitor. It also gives your business more opportunities to convert leads into customers.
Frequently Asked Questions
Install a trusted form plugin first. Create your form using the builder. Then embed it on your preferred page or post.
WPForms suits most beginners. Contact Form 7 offers greater flexibility. Choose the plugin matching your website requirements.
Yes. Most WordPress form plugins require no coding. Drag-and-drop builders make form creation quick and simple.
Enable reCAPTCHA and built-in spam protection. Keep your plugin updated regularly. Review submissions to detect suspicious activity.
Incorrect notification settings often cause delivery problems. Verify your email address first. Using SMTP also improves email reliability.
Yes. Many form plugins save submissions automatically. You can review entries directly from your WordPress dashboard.
Copy the generated shortcode from your plugin. Paste it into any page, post, or widget. Save your changes and preview the form.