
 ChatGPT
 Perplexity
 Grok
Grok
 Google AI
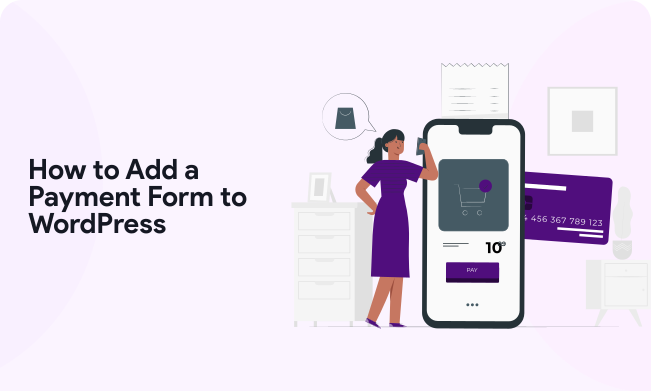
Forms can simplify payments across WordPress websites. A WordPress payment form can collect customer details while processing payments through trusted providers. This removes unnecessary checkout steps and lets customers complete payments directly through your website.
Adding payments does not always require coding skills. The right tools can simplify the entire process considerably. You can create forms using visual builders and connect your preferred payment provider. This guide explains each step clearly and covers common mistakes in payment forms.
What Is A WordPress Payment Form?
A WordPress payment form collects information from customers during transactions. It can collect names, emails, and order details before accepting payments. Payment providers usually process sensitive payment information securely.
Businesses can use these forms for different purposes. They can sell products through simple payment forms or collect service deposits. Businesses can also collect donations and membership fees. The best forms keep payment steps simple and straightforward.
For better form performance, consider LeadX Forms for flexible form creation.
Why Add Payment Forms To WordPress?
Payment forms can create smoother customer experiences. Customers can complete transactions without navigating complex checkout pages. They can also remain on your business website throughout the process. This can make the payment journey feel simpler.
A good form can support better conversion opportunities. Clear fields can reduce confusion during checkout. Simple layouts can also reduce unnecessary friction. Businesses can collect useful customer information simultaneously, making forms valuable for different business models.
Following effective form design best practices can further improve usability.
What Do You Need Before Adding Payments?
You need several things before building payment forms. First, choose a payment provider for processing transactions. Common providers include Stripe and PayPal. Your chosen provider should suit your customers and business requirements.
You also need a secure WordPress website. An SSL certificate protects information during website connections. Your website should also remain updated regularly. Regular updates can help reduce security and compatibility problems.
Step 1: Choose A Payment Form Builder
Start by selecting a reliable payment form builder. Your builder should support your preferred payment provider. It should also offer flexible form-building features for your requirements. Easy customisation can make future changes much simpler.
Choose Payment Support Carefully
Payment integrations determine how transactions are routed to providers. Check which gateways are supported before choosing your builder. Confirm whether your preferred provider is available for integration. Also review supported currencies and payment methods before deciding.
You should also compare important builder features. This includes integrations, customisation, and automation. You can explore LeadX Forms features before making your decision.
Step 2: Create Your Payment Form
Begin by creating a new payment form. Start with only essential customer information fields. Common fields include names and email addresses. You may also need additional contact information.
Then add the relevant product or service details. Display prices clearly beside each available option. Customers should understand exactly what they are purchasing. Avoid unclear descriptions or confusing pricing structures.
Add a clear payment button near the end. Use direct wording that explains the required action. For example, choose “Pay Now” when suitable. Keep the final action obvious for customers.
Add The Right Form Fields
Every field should have a clear purpose. Unnecessary fields can increase customer effort during checkout. They may also reduce the number of completed payment submissions. Ask only for information you genuinely need.
The number of fields can affect conversions. Review how many fields your lead form should have before finalising your payment form.
Step 3: Connect Your Payment Provider
Now connect your selected payment provider. Your builder should provide clear integration instructions. Follow each step carefully during the connection process. Incorrect settings can prevent successful transactions.
Stripe supports many online payment requirements. PayPal can also support various payment scenarios. Available options depend on your customers and location. Consider your preferred currencies and payment methods carefully.
Configure Payment Settings
Review every available payment setting carefully. Check currency, amounts, and transaction settings before publishing. Confirm that your form calculates totals correctly. Also review available payment confirmation options.
Test each setting before accepting real transactions. Confirm successful payments reach the correct account. Review failed payment behaviour as well. This helps identify configuration problems early.
Step 4: Add Payment Form To WordPress
Once your form works, add it to WordPress. Choose a page where customers expect payment options. A dedicated payment page can work well. Product pages can also include payment forms.
Many builders provide simple WordPress embedding options. You might receive a shortcode or embed instructions. Some builders offer direct WordPress publishing options. Follow your builder’s recommended publishing process.
Place payment forms where customers can easily find them. Avoid unnecessary clicks before reaching the payment form. Keep important payment actions easy to access. Clear placement can improve the overall user experience.
Keep Your Form Mobile-Friendly
Many customers use smartphones for online payments. Your payment form should work well across mobile devices. Check field spacing across smaller screens. Also ensure buttons remain easy to tap.
Mobile usability can also influence form completion. Avoid crowded layouts and unnecessary form elements. You can learn more about reducing form abandonment through better form optimisation.
Step 5: Test Your Online Payment Form
Testing should happen before accepting real payments. Never assume your form works immediately after creation. Complete several test transactions before publishing it. Use your payment provider’s testing tools when available.
Check every field during testing. Test required fields and optional fields separately. Confirm product selections produce accurate totals. Also test successful and failed payment scenarios.
Test Different Devices
Check your form across different screen sizes. Test desktops, tablets, and mobile devices. Review spacing, readability, and button accessibility. Also test different browsers before launching.
Testing should cover the entire customer journey. Check form submission and payment confirmation carefully. Confirm customers receive accurate success messages. Fix every discovered issue before going live.
Improve Payment Form Security
Payment security should remain a major priority. Customers need confidence before entering payment information. Use HTTPS on every payment-related webpage. Keep WordPress and plugins updated regularly.
Use trusted providers for processing sensitive payment details. Avoid storing sensitive card information yourself. Let established payment providers handle secure transactions. This can reduce several of your business’s security responsibilities.
Use Strong Website Access Controls
Use strong passwords for WordPress administrator accounts. Limit administrative access to trusted team members. Remove unused plugins from your website. Regularly review connected payment integrations.
You should also review security practices regularly. Check administrator permissions and active integrations. Remove unnecessary access whenever possible. These steps can reduce avoidable security risks.
Step 7: Optimise Your Payment Form
Creating a payment form is only the beginning. You should review its performance after launching it. Look for places where customers abandon payments. Use analytics to identify possible friction points.
Start by reviewing form length and field requirements. Remove fields that do not support your objective. Make payment information easy to understand. Also keep important messages short and clear.
Keep Checkout Simple
Simple payment experiences can reduce customer hesitation. Avoid adding unnecessary instructions or distracting elements. Keep pricing visible throughout the payment process. Make the final payment action easy to identify.
You should also review customer behaviour after launch. Identify where visitors stop completing payments. Test different layouts when performance remains weak. Continuous optimisation can improve completed payment rates.
Common Payment Form Mistakes To Avoid
Several mistakes can weaken your payment experience. One common mistake involves adding too many fields. Long forms can increase customer effort unnecessarily. Keep your form focused on essential information.
Poor mobile design can also reduce payment completions. Customers may struggle with small fields or buttons. Always review forms on smaller screens. Fix spacing and usability problems before launch.
Weak confirmation messages can create customer uncertainty. Customers should know whether payments succeeded. Provide clear messages after every completed transaction. Explain what happens next whenever necessary.
Start Accepting Payments Through WordPress
Adding payments to WordPress can be straightforward. You only need suitable tools and clear planning. Start by choosing your payment provider. Then select a reliable payment form builder.
Create a simple form with essential fields. Connect your payment provider and configure settings. Test every payment step before accepting real transactions. Then publish your form across relevant website pages.
Remember to prioritise security and customer experience. Keep forms simple, clear, and mobile-friendly. Review performance and regularly address weak areas. These steps can support smoother online payment experiences.
Conclusion
A WordPress payment form can simplify online transactions. It can also create smoother customer payment experiences. Start with a suitable payment provider and builder. Then create a focused form with essential fields.
Connect your provider and test every payment step. Successful payment forms require continuous attention and improvement. Monitor customer behaviour after launching your form. Review performance and remove unnecessary friction. Keep security and usability central to every update. A thoughtful payment process can support business growth.
Frequently Asked Questions
Payment forms can raise several practical questions. Understanding the basics makes setup much easier. These answers cover common payment form concerns and implementation considerations. They can help you plan your implementation more effectively. Always consider your specific business requirements carefully. Different businesses may need different payment solutions. Your payment provider can also affect available options. Choose tools that match your customer expectations
A WordPress payment form collects customer payment information. It can also collect product or service details. Customers submit payments directly through the website. Payment providers then process those transactions securely.
Yes, you can easily add payment forms. Many builders offer simple WordPress publishing options. You usually do not need advanced coding skills. Choose a builder supporting your preferred payment provider.
The best provider depends on your business needs. Consider currencies, payment methods, and customer preferences. Also check transaction fees and available integrations. Stripe and PayPal are common options.
Some payment tools support recurring payment functionality. Availability depends on your payment provider and builder. Check recurring payment features before creating your form. Choose options matching your subscription requirements.
Start with HTTPS and a trusted payment provider. Keep WordPress and plugins updated regularly. Avoid storing sensitive card information yourself. Also use strong administrator passwords and access controls.