 ChatGPT
 Perplexity
 Grok
 Google AI
Online forms help websites collect information quickly and efficiently. Manual form creation can be challenging for beginners without technical skills. Coding every field takes time and creates room for mistakes. Poorly designed forms can also frustrate visitors during completion.
Modern tools make form creation much easier for beginners. You can build useful forms without writing complicated code. This guide explains how to create an online form. You will learn each stage from planning through publishing.
What Is an Online Form?
An online form collects information through a website or webpage. Visitors enter details into different fields and submit responses. The form then sends responses to a chosen destination. That destination could include an email inbox or database.
Online forms support many everyday website activities. Businesses use them for enquiries and customer information. Organisations can collect registrations through simple forms. Surveys gather opinions and feedback from website visitors. Booking forms collect dates, preferences, and service details.
A well-planned form keeps information organised and easy to manage. It also gives visitors a clear communication channel. The design should always reflect the information you need.
Why Should You Create an Online Form?
Online forms create simple communication channels between websites and visitors. They remove unnecessary steps from common information-sharing processes. Visitors can submit details without writing separate emails. Businesses can manage responses more efficiently. Forms also create consistent structures across different submissions.
Simplify Information Collection
Forms organise visitor information through clear and structured fields. Visitors enter specific details instead of sending lengthy messages. Each response follows the same basic structure. This consistency makes information easier to review later. Clear fields also help visitors understand exactly what you need.
Improve Website Communication
Forms create direct communication channels between visitors and businesses. Visitors can ask questions without having to search for contact details. They can also provide relevant information during submission. This gives businesses useful context from the beginning. A simple form can support clearer website communication.
Reduce Manual Work
Digital forms can significantly reduce repetitive administrative tasks. They collect responses without requiring manual data entry. Many platforms can send automatic notifications after submissions. These alerts can help teams respond more quickly. Some tools also organise responses within central dashboards.
What Should You Plan Before Creating Your Form?
Good forms start with clear planning and simple objectives. You should understand your requirements before adding fields. This prevents unnecessary questions and confusing layouts. It also helps you choose suitable form-building tools.
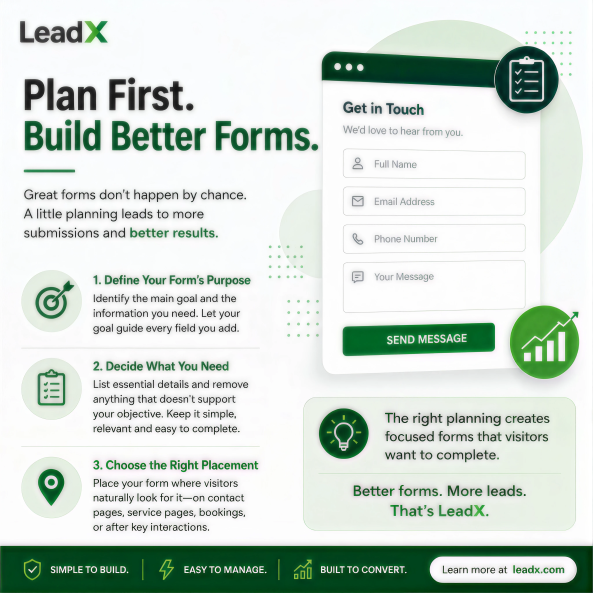
Define Your Form’s Purpose
Start by identifying the main goal of your form. Ask what information you need from each visitor. Your goal should guide every field you eventually add. Enquiry forms need contact information and messages.
Surveys need questions that gather useful opinions. Booking forms need dates and service details. A clear purpose keeps your form focused.
Decide What Information You Need
List the information visitors must provide before building. Carefully separate essential details from optional information. Only request information that supports your main objective. Extra fields can make forms longer and less appealing. Visitors may abandon forms that demand unnecessary information. Keep every field relevant to the intended action.
Choose Where Visitors Will Find It
Think about where visitors naturally need your form. Contact forms suit dedicated contact or enquiry pages. Booking forms can work beside relevant service information.
Feedback forms may appear after customer interactions. The right placement makes forms easier to discover. It can also encourage more visitors to complete them.
How to Create an Online Form Step by Step
You can create an online form through several simple steps. Start with your purpose and build around that goal. The right online form builder can simplify the process. Most platforms provide tools for fields, design, and settings. Begin with a simple structure rather than adding everything.
Choose an Online Form Builder
Choose a platform that matches your experience and requirements. Look for a simple interface that beginners understand. Templates can also speed up the initial setup. Check whether the platform supports useful integrations.
Consider features for notifications and response management. Look for options supporting customisation and mobile layouts. You can use a tool like LeadX Forms to create and customise forms through a simple no-code interface.
Start With a Template or Blank Form
Many platforms offer templates for common form requirements. Templates can save time when your needs remain straightforward. Choose one that closely matches your intended purpose. You can then adjust its fields and settings. A blank form offers greater control over structure. Use this option when your requirements need flexibility.
Add and Arrange Your Form Fields
Add only fields that support your main objective. Common fields include names, emails, and messages. Other forms may require dates or selections. Some forms might also need file uploads. Choose field types that match each requested response. Arrange fields in a logical order for visitors. A logical sequence makes completion easier and faster.
Customise Your Form Design
Customise your form so it naturally matches your website. Use clear labels that explain every field. Keep instructions short and easy to understand. Choose spacing that keeps fields visually distinct. Avoid decorative elements that distract visitors. A simple design supports usability across different devices.
Configure Notifications and Confirmations
Set the correct destination for submitted responses. Many platforms can send notifications directly to email. Choose an address that someone checks regularly. Create a clear subject line for each notification. You should also create a confirmation message for visitors. Explain what happens after successful submission. This gives visitors confidence that their response arrived.
Publish and Embed Your Form
Choose the website page that best suits your form. Most builders provide simple embedding options for websites. Some platforms offer direct publishing tools instead. Follow the platform’s instructions for adding your form. Check the final page before sharing it publicly. Make sure the form fits within your website layout.
How to Create an Online Form Without Coding
Coding no longer provides the only way to build forms. Modern tools let beginners create forms through visual interfaces. You can add fields without writing programming instructions. No-code tools also simplify future changes and updates.
Use a No-Code Form Builder
A no-code form builder removes the need for programming. You can create fields through simple visual controls. Most platforms provide templates for common requirements. You can adjust those templates to suit your needs. This approach works well for beginners and small businesses. It also reduces technical barriers during creation.
Build Forms With Drag-and-Drop Tools
Drag-and-drop tools make field placement straightforward. You can select an element and move it into position. This removes complicated coding tasks from the process. You can also rearrange fields whenever your structure changes. Visual editing makes the process easier to understand. It also helps users build forms more quickly.
Update Forms Without Editing Code
No-code tools make future changes much easier. You can add, remove, or rearrange fields visually. You can also update labels and instructions whenever needed. These changes usually require no developer involvement. That flexibility helps forms remain useful over time. Businesses can adjust forms when requirements change.
How to Make Your Online Form User-Friendly
A functional form should also feel easy to complete. Visitors should be able to understand every question without unnecessary effort. Small design choices can improve the overall experience. Good usability starts with simple and relevant information.
Keep Fields Short and Relevant
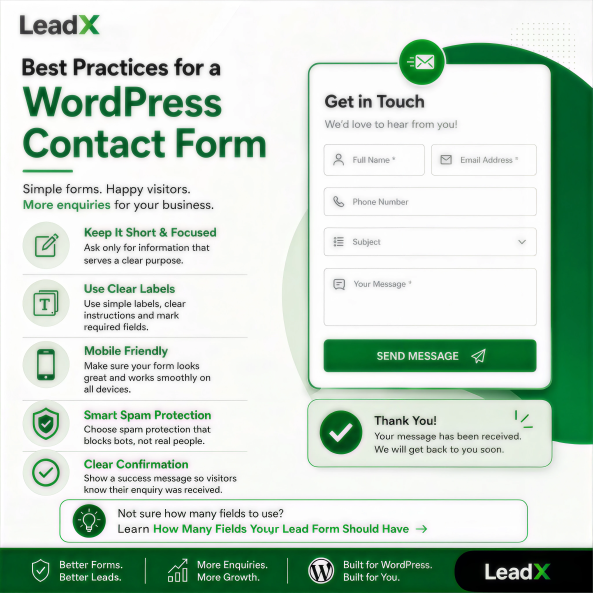
Ask visitors only for information you genuinely need. Long forms can discourage visitors from completing them. Remove questions that do not support your main goal. Group related fields together when necessary. A shorter form often creates a smoother experience. This keeps the form focused and easier to complete.
Use Clear Labels and Instructions
Use familiar words that visitors understand immediately. Avoid technical terms unless your audience expects them. Keep instructions short and place them near fields. Clear labels reduce uncertainty during form completion. Visitors should know exactly what each field requires. Simple wording can also reduce mistakes during submission.
Make the Form Mobile-Friendly
Many visitors access websites through mobile devices. Your form should work comfortably across smaller screens. Fields should remain easy to tap and complete. Buttons need enough space for comfortable interaction. Check spacing, text size, and field alignment carefully. Test the form across different screen sizes.
Create a Clear Submission Action
Your submission button should explain the next action. Use direct wording that matches the form’s purpose. An enquiry form might use “Send Enquiry”. A booking form might use “Request Booking”. Avoid vague buttons that create uncertainty. After submission, show a clear confirmation message.
What Types of Custom Online Forms Can You Create?
You can create custom online forms for many website needs. The right structure depends on your specific purpose. Different forms collect different types of information. Your chosen fields should support the intended visitor action.
Contact and Enquiry Forms
Contact forms help visitors send questions through websites. They usually request names, email addresses, and messages. You can add fields for specific enquiry details. Keep these forms short to encourage more submissions. Clear questions can also improve response quality. Only request details supporting your follow-up process.
Registration and Booking Forms
Registration forms collect details for events or services. Booking forms can gather dates, preferences, and contact information. You can include selection fields for available options. This structure keeps booking information organised from the start. Clear fields help visitors provide accurate booking details.
Survey and Feedback Forms
Surveys help businesses collect customer opinions. Feedback forms can reveal problems within customer experiences. Use suitable question types for the information you need. Avoid asking too many questions in a single survey. Short surveys usually feel easier for visitors to complete. Focused questions can produce more useful responses.
How to Test Your Form Before Publishing
Testing helps identify problems before visitors encounter them. Always test the complete form before promoting it publicly. Testing should cover both functionality and usability. Check whether every field behaves correctly. Review notifications and confirmation messages carefully. Finally, test the form across different devices.
Check Every Field
Test every field using realistic information. Check required fields and different response options. Make sure visitors cannot accidentally skip essential information. Look for missing labels or incorrect field settings. Also check that each field accepts suitable responses. Fix unexpected behaviour before publishing the form.
Test Notifications
Submit several test responses before launching your form. Check whether each notification reaches the correct recipient. Review the information included within every notification. Test confirmation messages after successful submissions. Fix notification problems before publishing the form. This helps prevent missed enquiries.
Check Different Devices
Test the form across desktop, tablet, and mobile screens. Check whether every element remains visible and usable. Look for spacing problems or awkward field layouts. Test buttons and menus across different screen sizes. Fix usability problems before directing visitors towards the form.
Common Mistakes to Avoid
Creating forms becomes easier when you understand common mistakes. Many problems come from unnecessary fields and unclear instructions. Others appear after publishing without proper testing. Keep the form focused on its main purpose. Review every instruction from the visitor’s perspective. For more tips on creating effective forms, explore our guide on The Psychology Behind High-Converting Forms.
- Adding unnecessary fields that increase completion time.
- Using unclear labels that confuse visitors.
- Writing lengthy instructions for simple questions.
- Ignoring mobile usability during the design process.
- Forgetting to configure submission notifications.
- Publishing forms without testing important functions.
- Using complicated layouts that distract from the main purpose.
Conclusion
Creating an online form does not require advanced technical skills. Start with a clear purpose and relevant information. Choose an online form builder that matches your needs.
Keep the design simple and easy to navigate. Test every field before publishing your completed form. No-code tools can make the creation process easier. Focus on visitor needs throughout every stage.
Frequently Asked Questions
The easiest approach is to use a simple online form builder. Choose a platform with templates and visual editing tools. You can then add fields without writing code.
Yes, you can create an online form without coding. A no-code form builder provides visual tools for creation. You can easily add fields and customise layouts.
Start with fields that directly support your form’s purpose. Most forms need basic contact or response information. Avoid adding fields that serve no useful purpose.
You can create web forms using a suitable form builder. Build your form, configure settings, and embed it. Always test the form after adding it.
Beginners should prioritise simplicity and useful features. Look for templates, drag-and-drop editing, and notification options. Check whether the platform supports future requirements.